Fiberglass Manufacturing: Top Suppliers & Fabrication Companies
Fiberglass Manufacturing: Top Suppliers & Fabrication Companies
Have you ever wondered how the products we use every day are made? One of the materials that play a crucial role in many industries is fiberglass. It's a composite material made from glass fibers and resin, which is used to create various products such as tanks, pipes, panels, and more. The process of manufacturing fiberglass requires advanced technology and expertise.
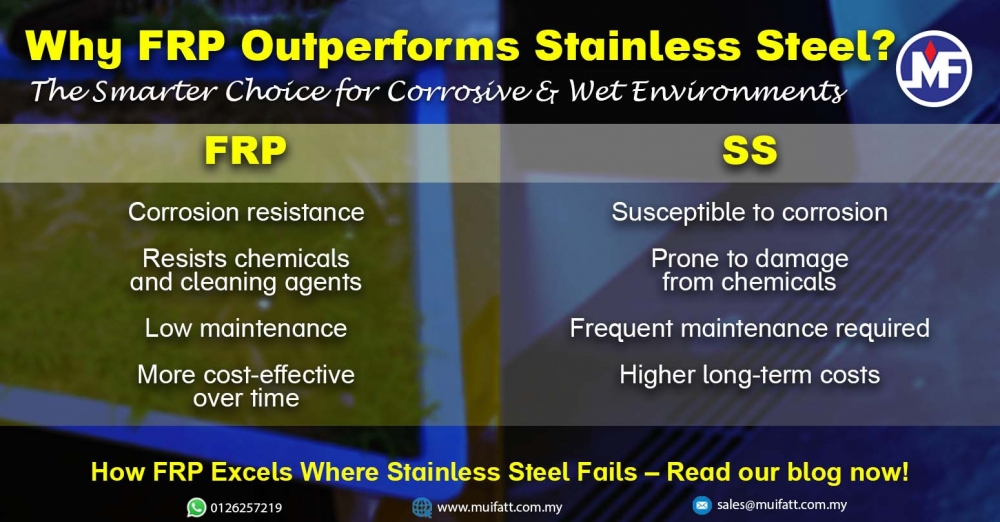
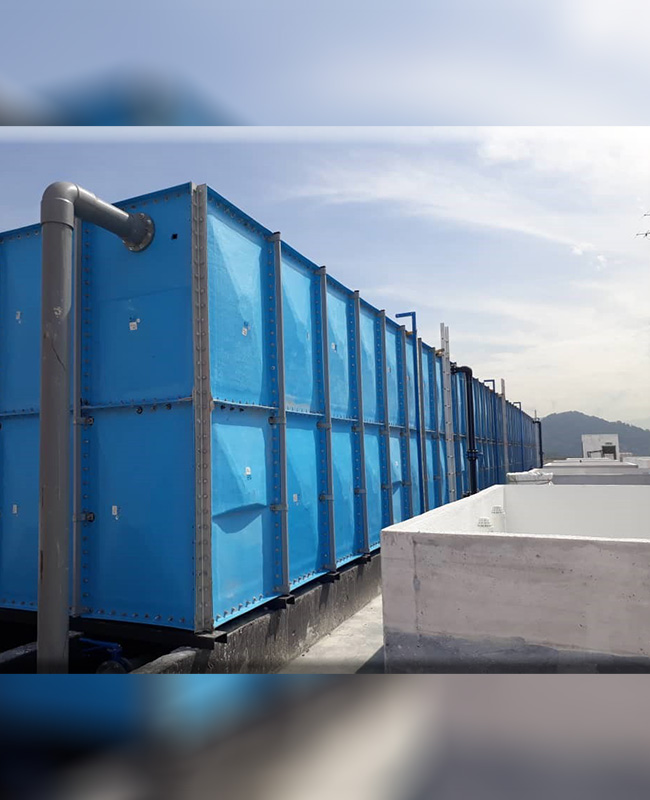
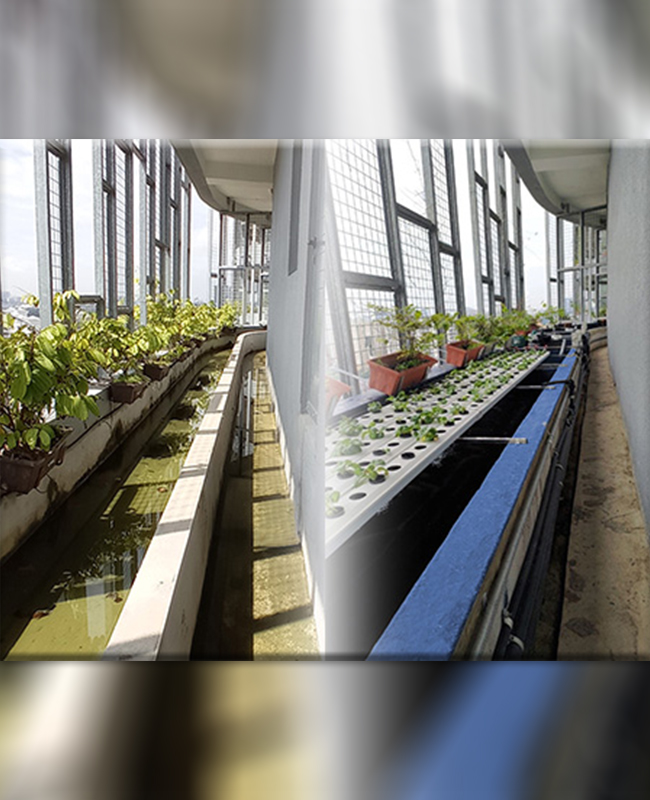
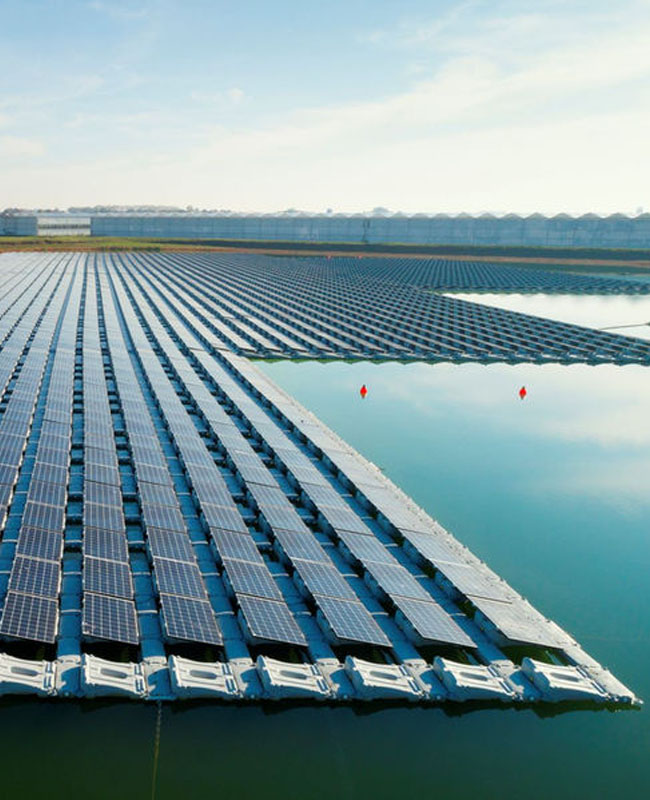
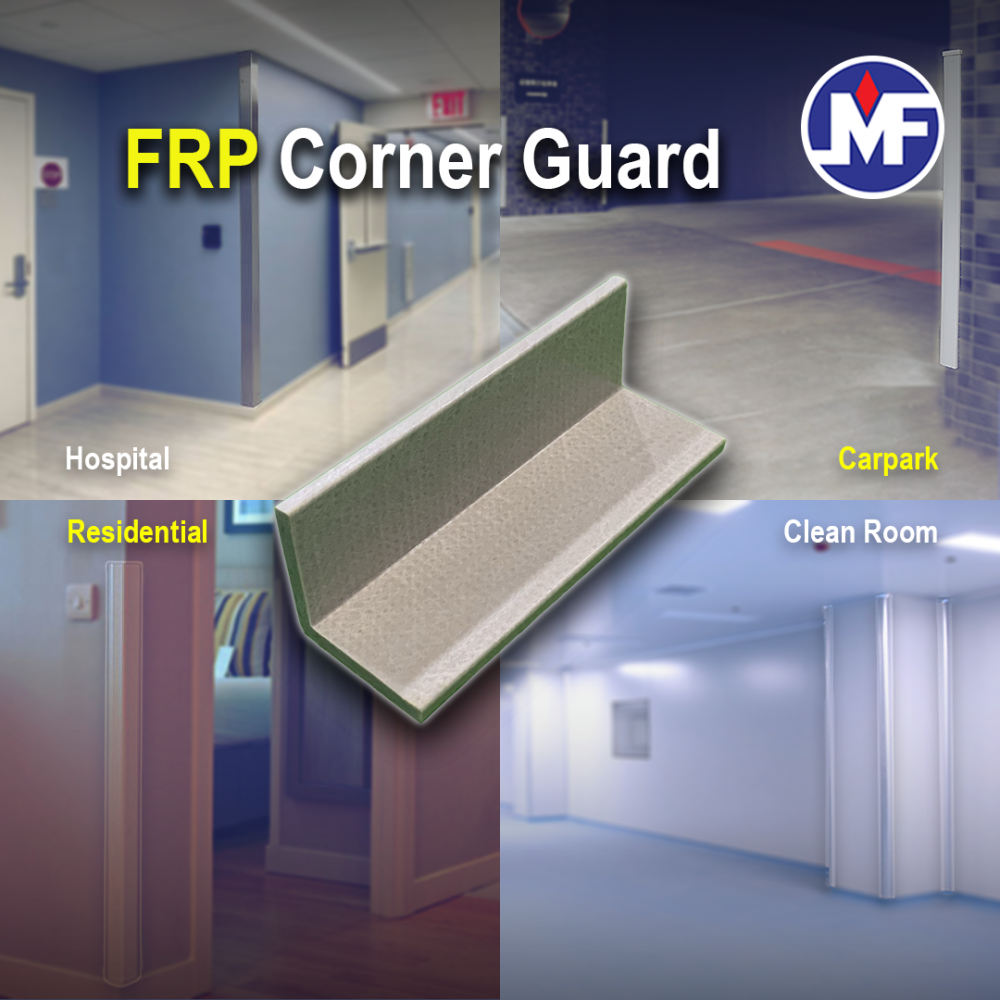
Fiberglass manufacturers produce FRP (Fiber Reinforced Polymer) products that are used in different industries like construction, automotive, aerospace, marine, and more. These products have unique properties that make them suitable for specific applications. For instance, fiberglass tanks are corrosion-resistant and can withstand harsh environments.
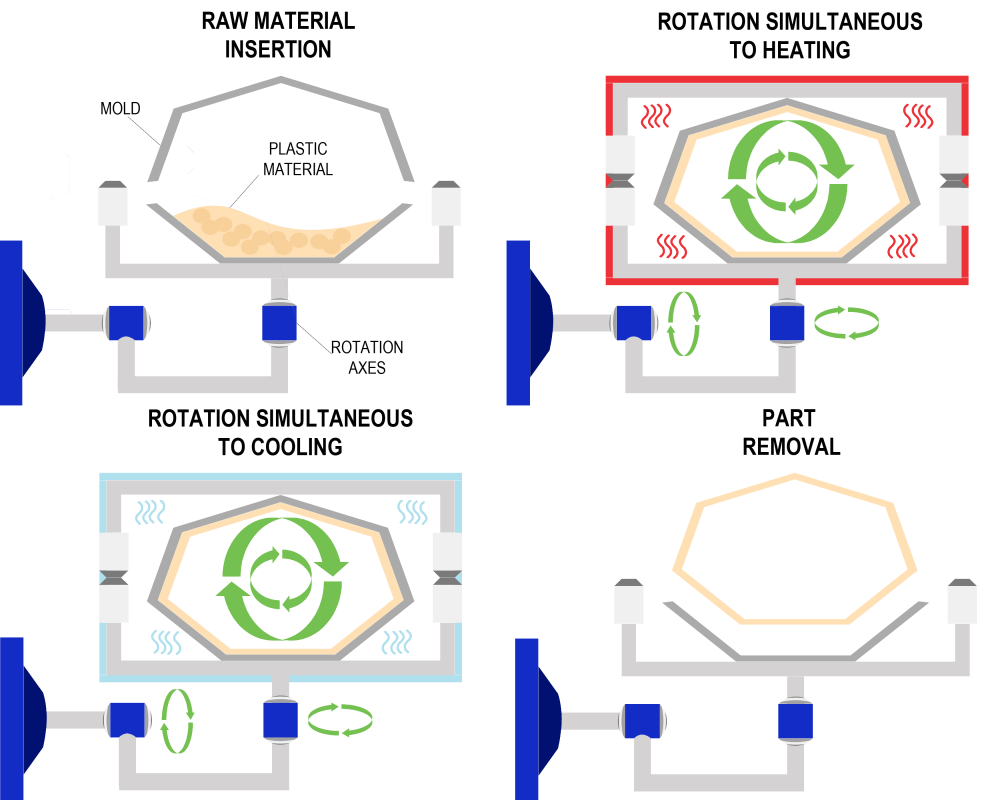
The manufacturing process of fiberglass involves several steps that require precision and attention to detail. First, raw materials like glass fibers and resin are mixed together to form a matrix. Then the matrix is molded into the desired shape using molds or other techniques.
Fiberglass manufacturers use advanced technology like computer-aided design (CAD) software to create high-quality products with precise measurements. They also conduct rigorous testing procedures to ensure that their products meet industry standards for strength, durability, and safety.
It all started back in 1932 when Owens Corning invented this revolutionary material. Since then, there has been significant progress in the field of fiberglass manufacturing technology.
Importance of Choosing a Reliable Fiberglass Manufacturer
Why Choose High-Quality Fiberglass Products?
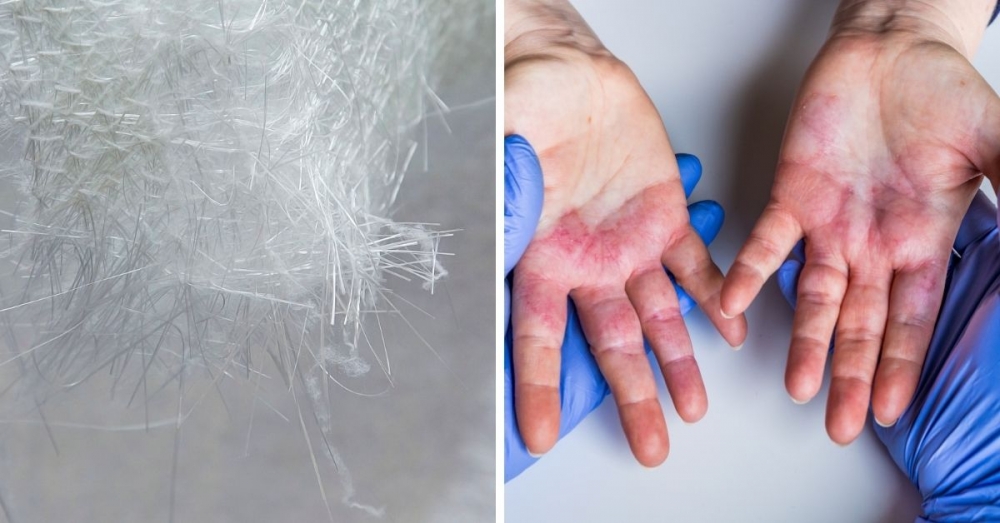
Fiberglass is a popular material used in various industries, including construction, automotive, and marine. It is known for its strength, durability, and flexibility.Quality should be the top priority.
High-quality fiberglass products are essential for ensuring longevity and durability. They can withstand harsh weather conditions and resist wear and tear. Low-quality fiberglass materials may result in costly repairs or replacements down the line.
For example, when choosing a fiberglass pool for your backyard, you want to ensure that it will last for years without needing significant repairs or maintenance. A reliable fiberglass manufacturer will provide high-quality materials that can withstand extreme temperatures and chemical exposure.
Consistent Quality from a Reliable Manufacturer
Choosing a reliable fiberglass manufacturer guarantees consistent quality in every product they offer. These manufacturers use advanced technologies to produce high-quality materials consistently.
A reliable manufacturer follows strict quality control procedures throughout the production process to ensure that each product meets specific standards. This consistency ensures that every customer receives the same level of quality regardless of their location or order size.
When selecting a fiberglass manufacturer, look for one with an established reputation for producing high-quality materials consistently over time. Check reviews online to see what other customers have experienced with their products.
Reduced Risk of Costly Repairs and Replacements
Using quality fiberglass materials reduces the risk of costly repairs and replacements down the line. High-quality products are less likely to break or fail prematurely than low-quality ones.
When using low-quality fiberglass materials in construction projects such as roofing or insulation, there is a higher risk of leaks or mold growth due to poor installation practices or inferior materials used by unscrupulous contractors.
By choosing reputable manufacturers who use only high-grade raw materials in their production process, you can reduce these risks significantly.
When to Use Fiberglass Mat or Cloth?
Fiberglass mat and cloth are two types of materials used in fiberglass manufacturing. They serve different purposes, depending on the project's specific requirements.
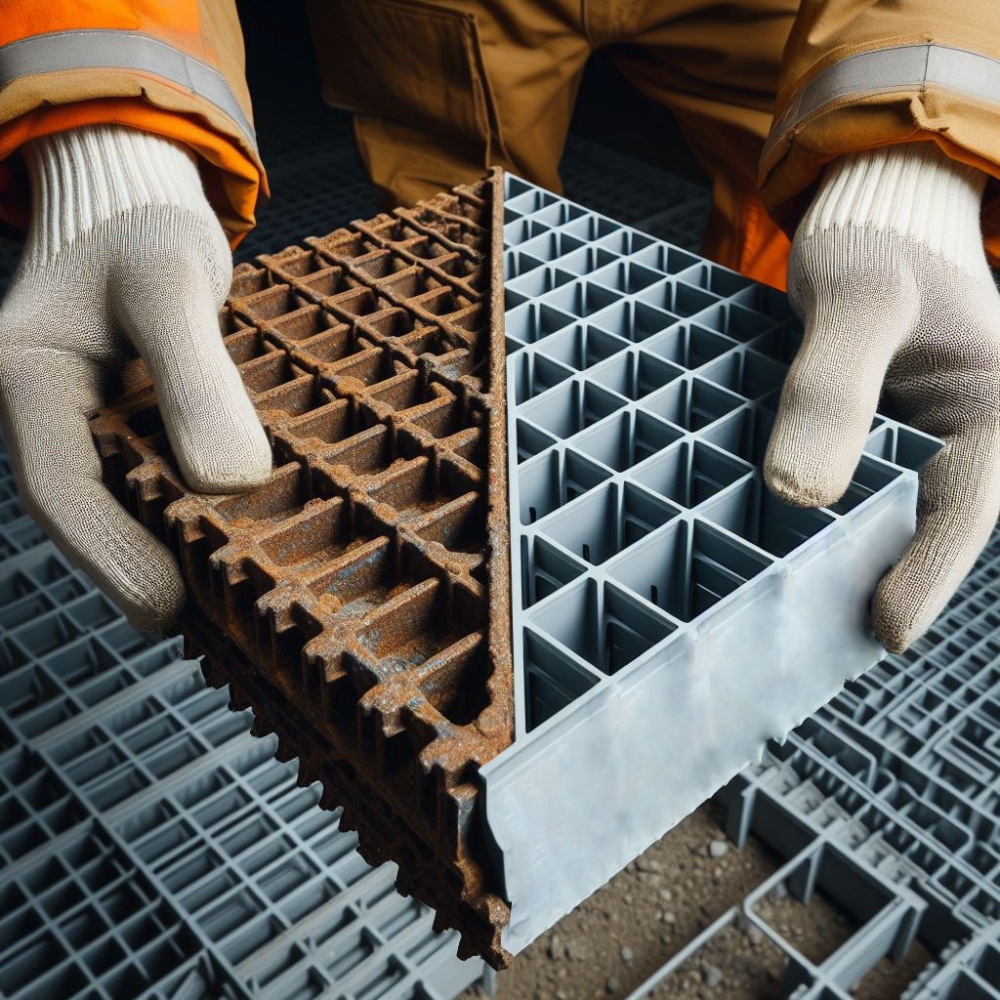
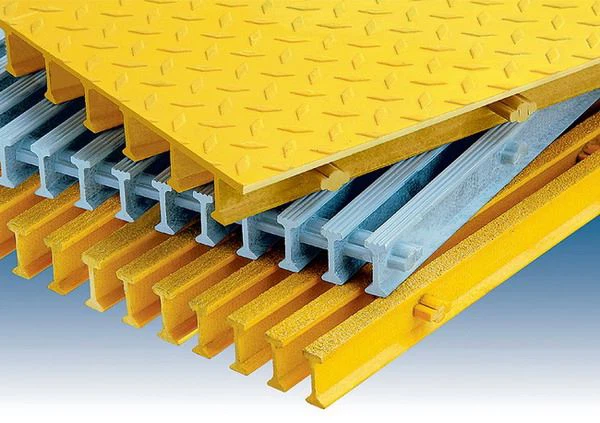
Fiberglass mat is a non-woven material made from chopped glass fibers held together with a binder. It is commonly used in construction projects such as roofing or insulation due to its excellent thermal and acoustic properties.
Fiberglass cloth, on the other hand, is a woven material made from continuous glass fibers. It is commonly used in marine applications such as boat building or repair due to its high strength and durability.
When deciding whether to use fiberglass mat or cloth, consider the project's specific requirements. If you need a material that can provide thermal insulation or soundproofing, fiberglass mat may be the best choice. If you need a material that can withstand extreme conditions and resist wear and tear, fiberglass cloth may be more suitable.
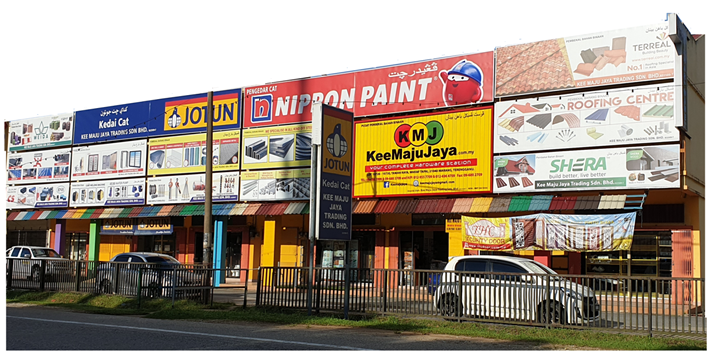
Fiberglass Manufacturers and Suppliers in Selangor, Malaysia
If you're looking for high-quality fiberglass products, Selangor, Malaysia is the place to be. This region is home to several reputable fiberglass manufacturers and suppliers that offer a wide range of products for various industries.
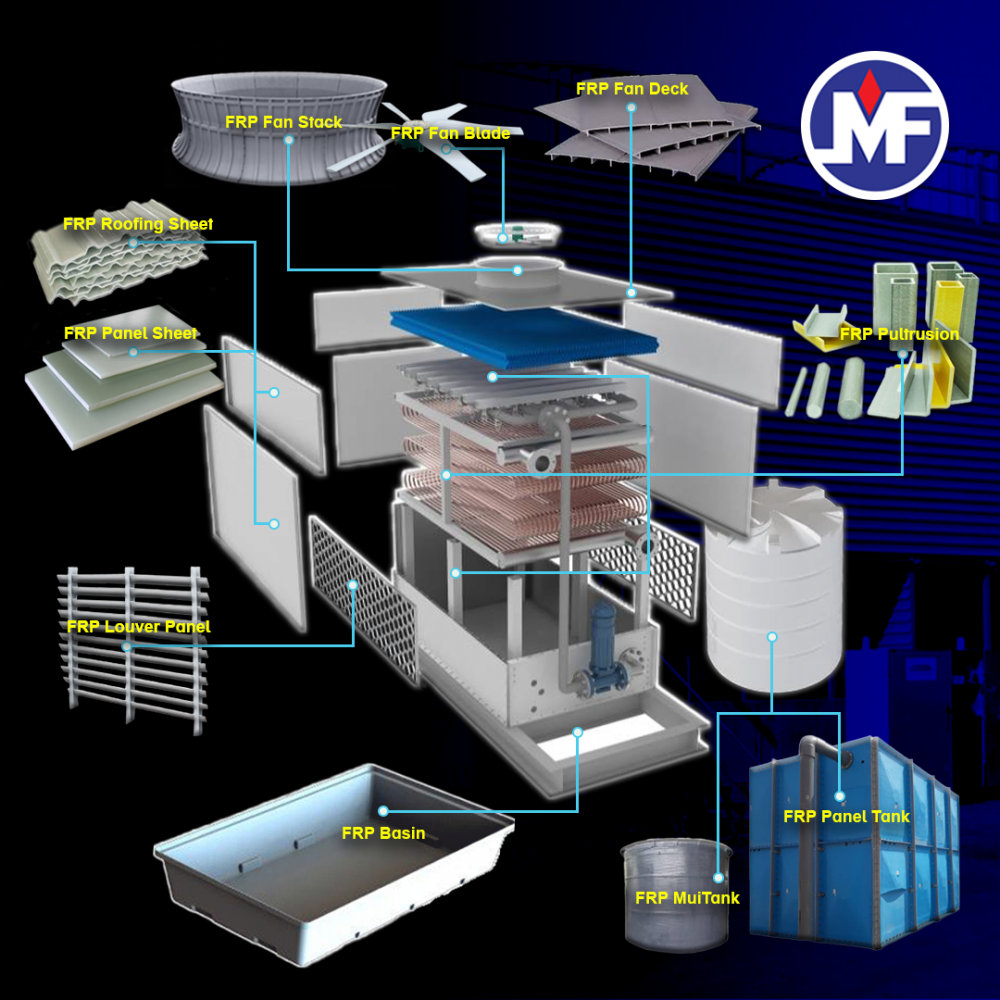
Fiberglass Fabrication
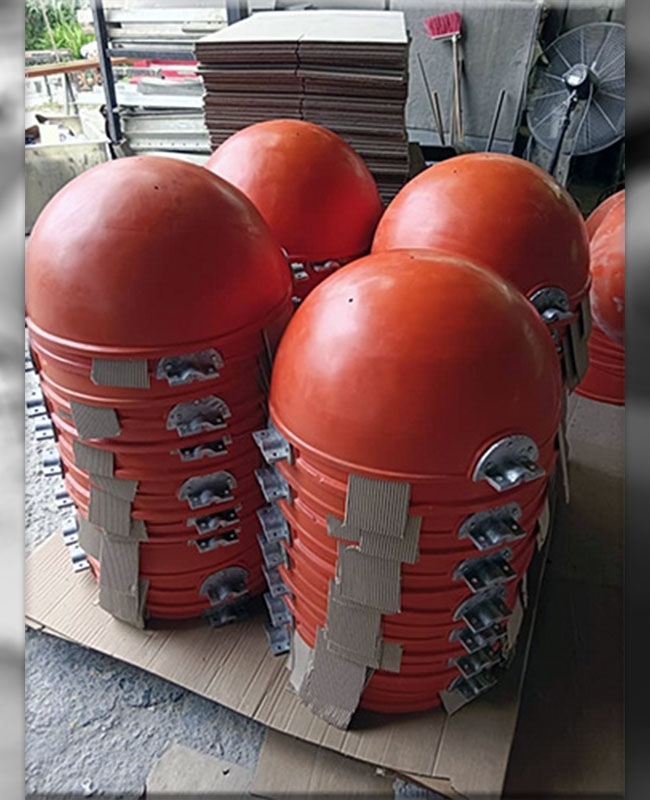
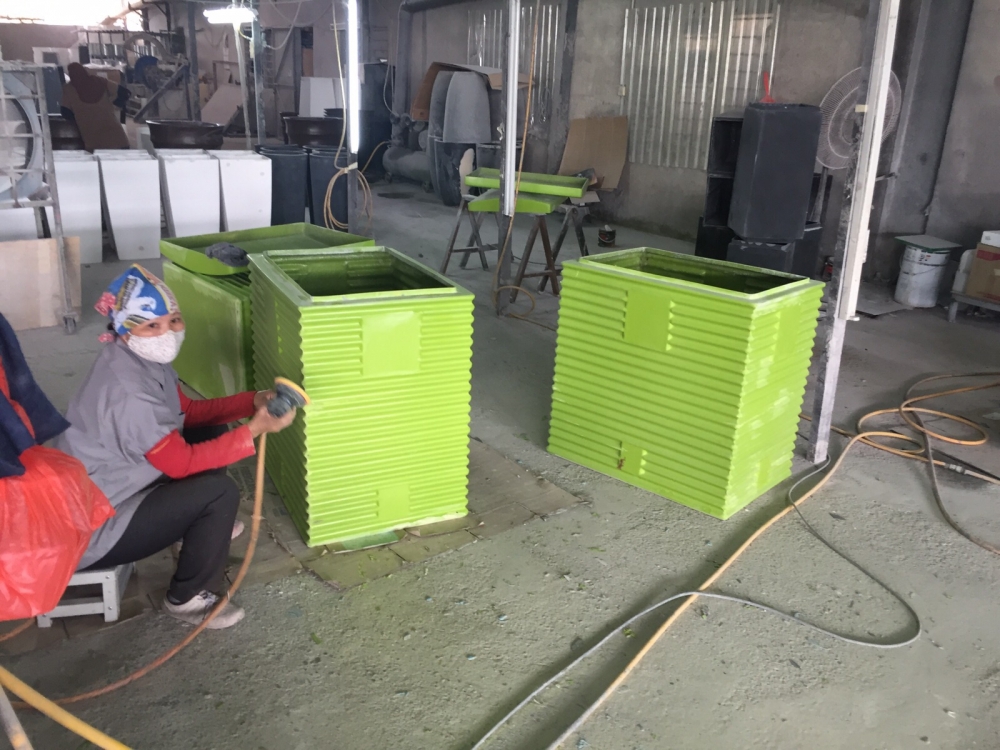
One of the most popular uses of fiberglass materials is in fabrication. Fiberglass fabricators use composite materials to create a variety of products such as tanks, pipes, ducts, and other custom-made pieces. There are many reputable fiberglass fabricators in Selangor that can provide you with high-quality custom-made fiberglass products.
One such manufacturer is FIBERFLON® Malaysia Sdn Bhd. This company specializes in the production of PTFE-coated glass fabrics which are highly resistant to chemicals and extreme temperatures. They also manufacture PTFE-coated conveyor belts used in manufacturing processes.
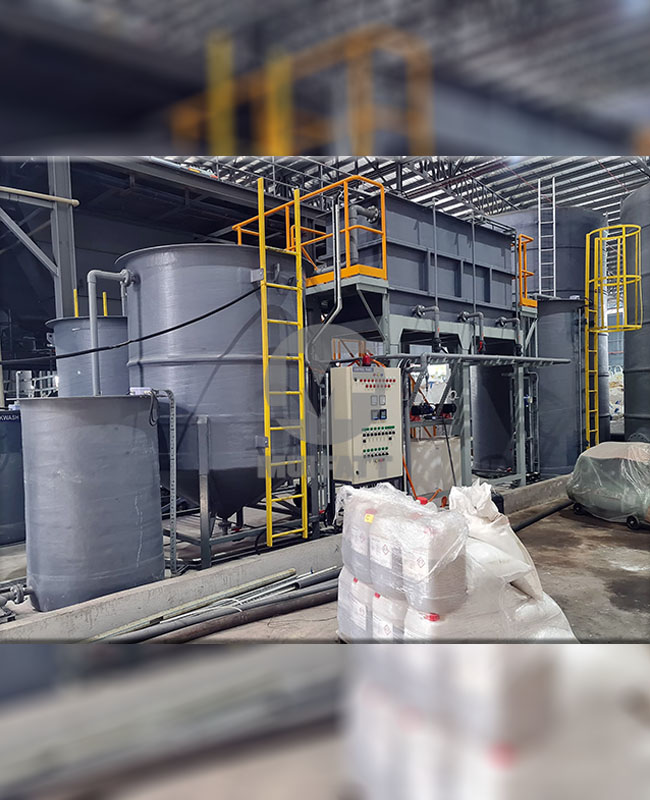
Another well-known manufacturer is G&P Fiber Glass Sdn Bhd which produces a wide range of fiberglass-reinforced plastic (FRP) products for industrial applications such as water treatment plants, chemical storage tanks, and cooling towers.
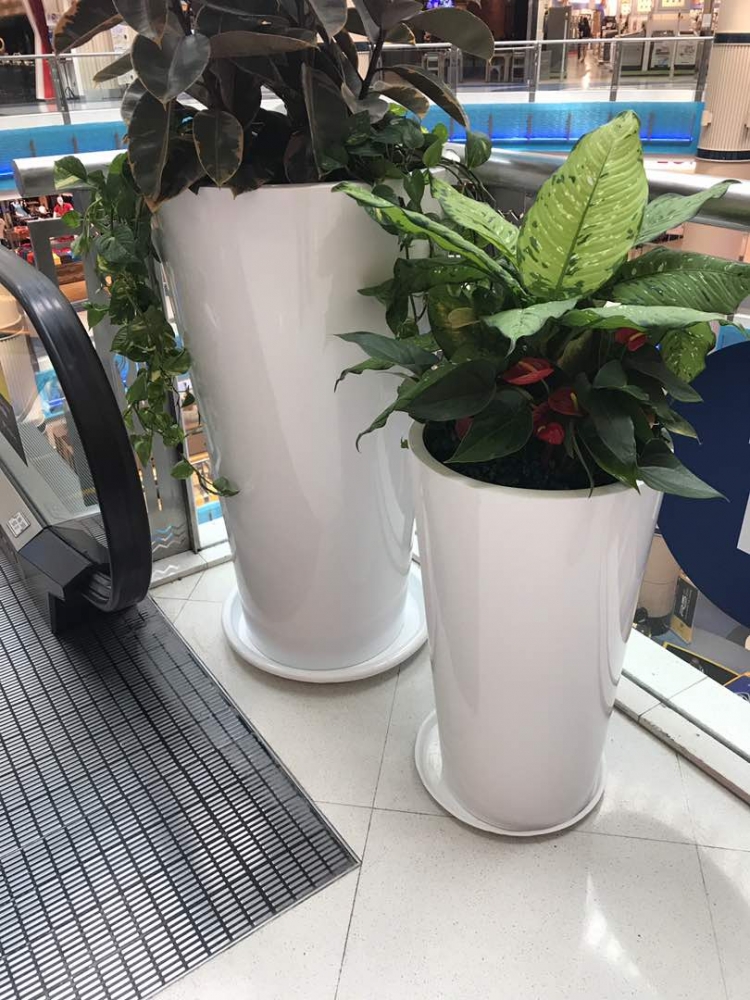
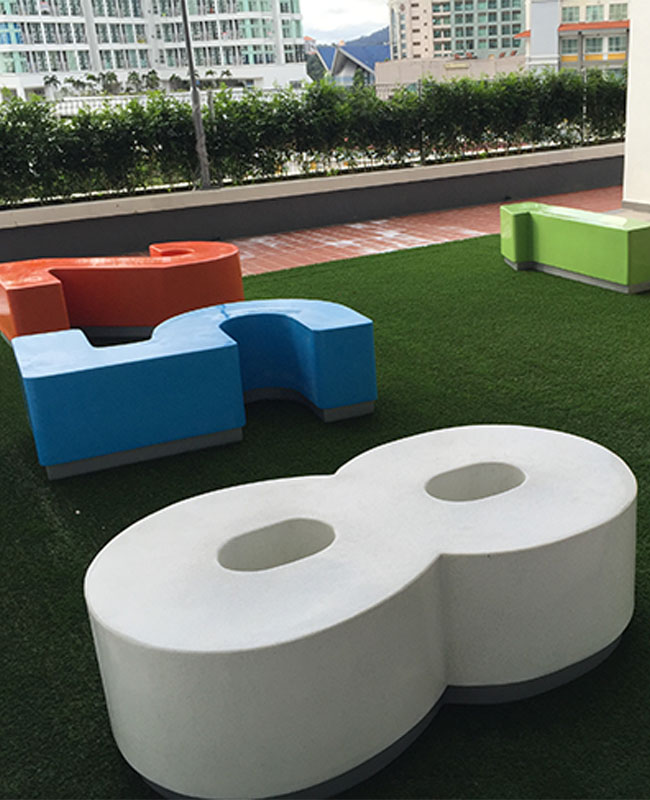
Fiberglass Furniture
Fiberglass furniture has become increasingly popular due to its durability and stylish designs. Many furniture manufacturers in Selangor specialize in producing high-quality fiberglass furniture that can withstand harsh weather conditions while maintaining its aesthetic appeal.
One such manufacturer is DZIGNO Sdn Bhd which produces an extensive range of outdoor furniture made from durable materials including aluminum frames coated with powder paint finishes combined with woven synthetic rattan fibers or teak wood accents.
Another manufacturer worth mentioning is Kian Contract Sdn Bhd which specializes in producing commercial-grade furniture for hotels and resorts using high-quality materials like solid surface tops combined with molded FRP bases creating unique yet functional designs.
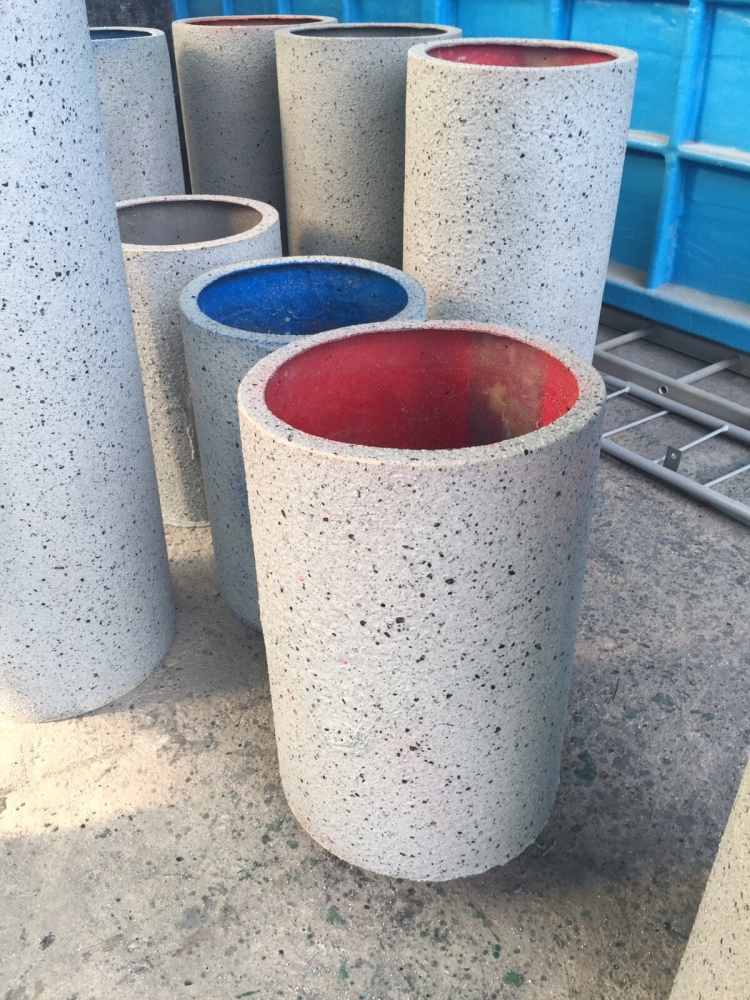
Fiberglass Materials
Fiberglass materials are widely used in various industries such as automotive, construction, and marine. The quality of these materials is essential to ensure the durability and reliability of the products produced.
One of the leading manufacturers of fiberglass materials in Selangor is AGC Asia Pacific Pte Ltd which produces high-quality glass fibers for use in composites manufacturing. They also manufacture specialty fiberglass products such as chopped strands, rovings, and mats.
Another reputable supplier is Nippon Electric Glass (NEG) Malaysia Sdn Bhd which produces a wide range of fiberglass products including E-glass yarns, ECR glass fiber mats, and Cem-FIL® alkali-resistant fiberglass reinforcing mesh for concrete reinforcement.
Top Fiberglass Manufacturers and Suppliers in the USA
Owens Corning: Global Leader in Fiberglass Production
Owens Corning is a global leader in fiberglass production with a strong presence in the USA. The company produces a wide range of fiberglass products for various industries including construction, transportation, and industrial markets. Owens Corning offers high-quality insulation solutions that are energy-efficient and sustainable. The company's insulation products help reduce energy consumption, lower greenhouse gas emissions, and improve indoor air quality.
In addition to insulation products, Owens Corning also produces roofing shingles, composites, and other building materials. The company has been recognized for its commitment to sustainability and has received numerous awards for its environmental initiatives. Owens Corning is committed to reducing waste, conserving resources, and protecting the environment.
PPG Industries: Wide Range of Fiberglass Products for Various Industries
PPG Industries is another leading manufacturer of fiberglass products in the USA. The company offers a wide range of fiberglass products for various industries including automotive, construction, marine, and aerospace. PPG's fiberglass products are known for their strength, durability, and resistance to corrosion.
The company's automotive fiberglass products include body panels, hoods, fenders, spoilers, and other components used in racing cars. In the construction industry, PPG's fiberglass products are used in roofing systems as well as wall panels and facades. In the marine industry, PPG's fiberglass products are used in boat hulls as well as decks and superstructures.
PPG Industries is committed to innovation and invests heavily in research and development to create new technologies that improve product performance while reducing environmental impact.
Jushi Group: One of the Largest Fiberglass Manufacturers in the World
Jushi Group is one of the largest manufacturers of fiberglass in the world with a production capacity of over 2 million tons per year. The Chinese-based company has operations around the globe, including in the USA. Jushi Group produces a wide range of fiberglass products for various industries including construction, transportation, and wind energy.
The company's fiberglass products are known for their high strength-to-weight ratio, excellent corrosion resistance, and thermal insulation properties. Jushi Group's products are used in wind turbine blades, automotive components, and building materials.
Jushi Group is committed to sustainability and has implemented numerous initiatives to reduce its environmental impact. The company has invested heavily in renewable energy sources such as solar and wind power to reduce its reliance on fossil fuels.
OCM Enterprise as a Fiberglass Manufacturer and Supplier
Custom Fiberglass Products
OCM Enterprise is a leading custom fiberglass manufacturer and supplier. They specialize in producing composite products made from fiberglass and carbon fiber, which are used in various industries such as oil and gas, automotive, construction, marine, and many more. The company has a team of experienced professionals who can design custom fiberglass products according to customers' specific needs.
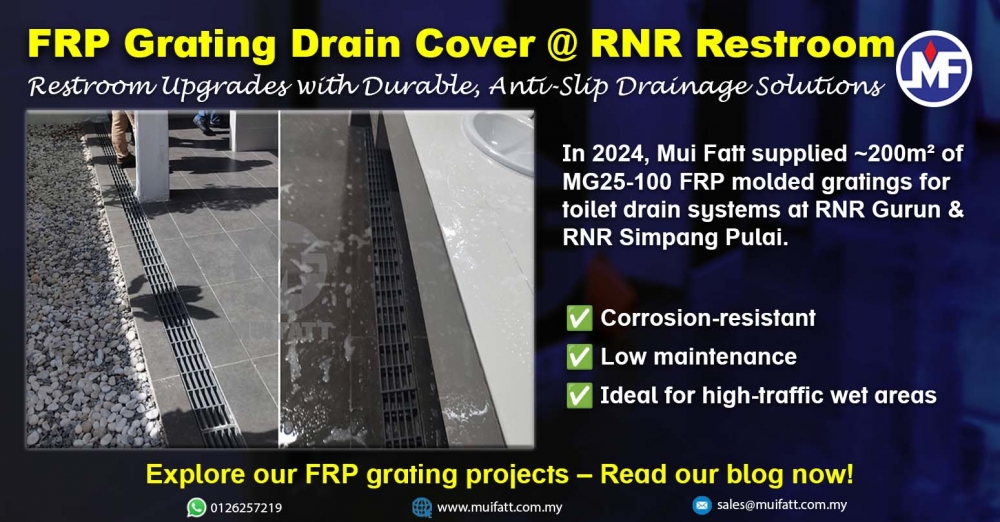
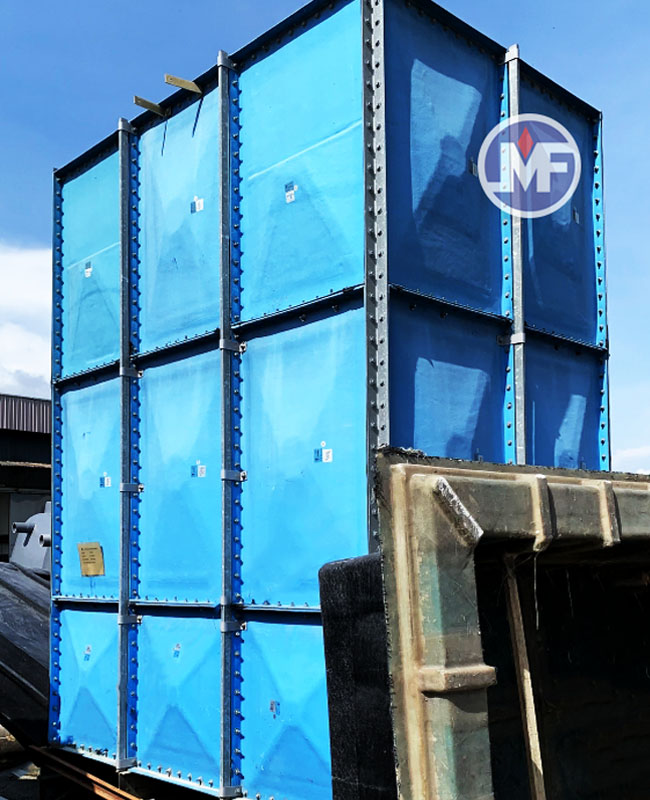
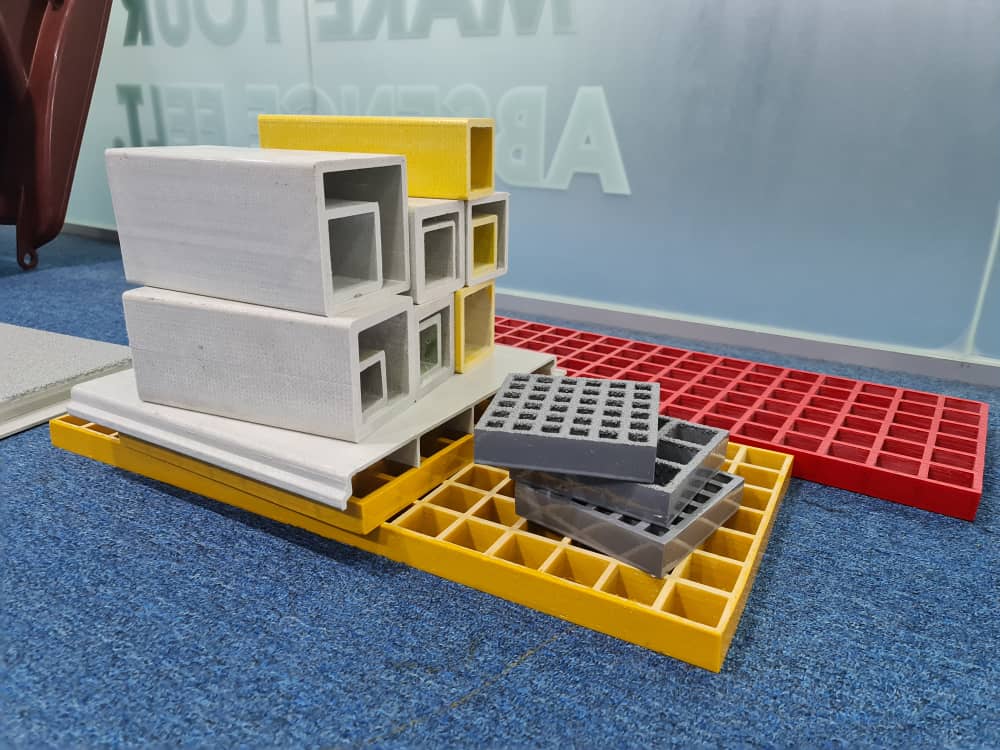
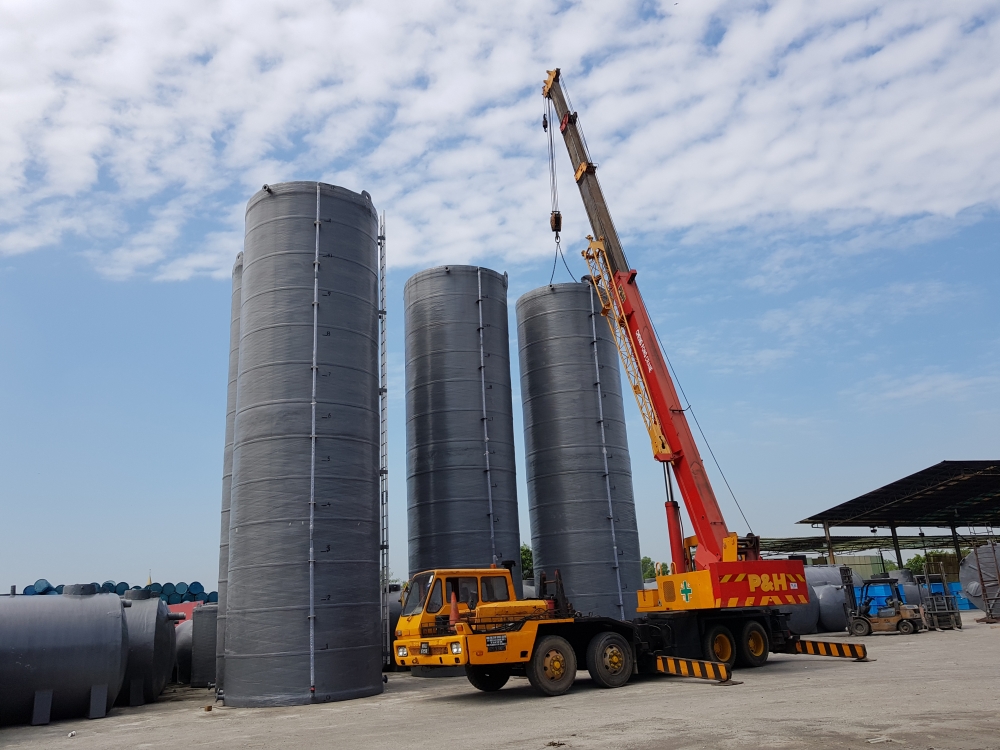
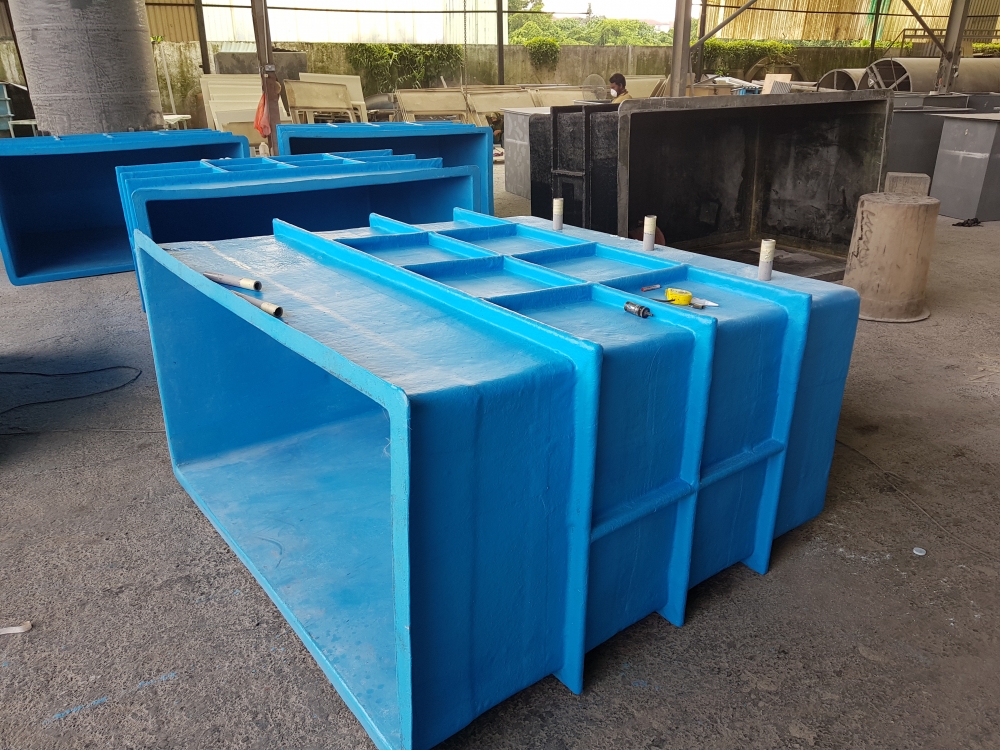
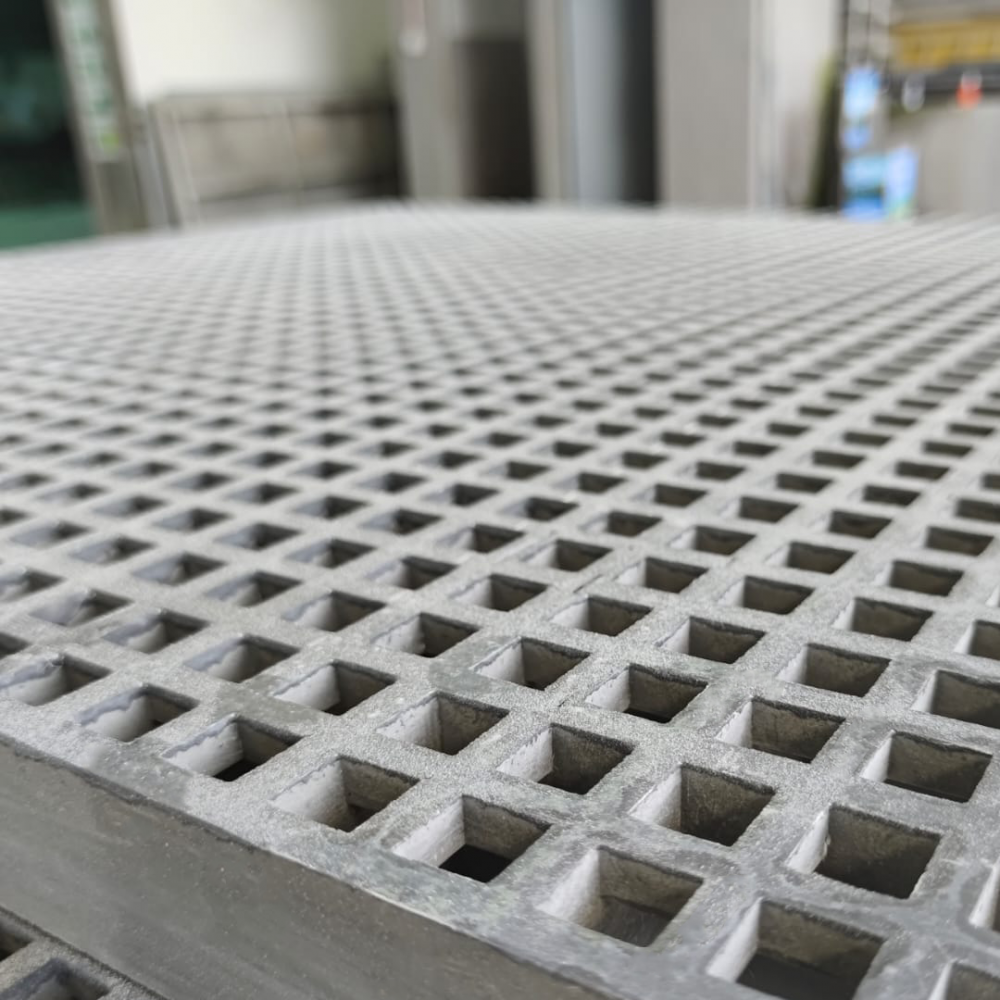
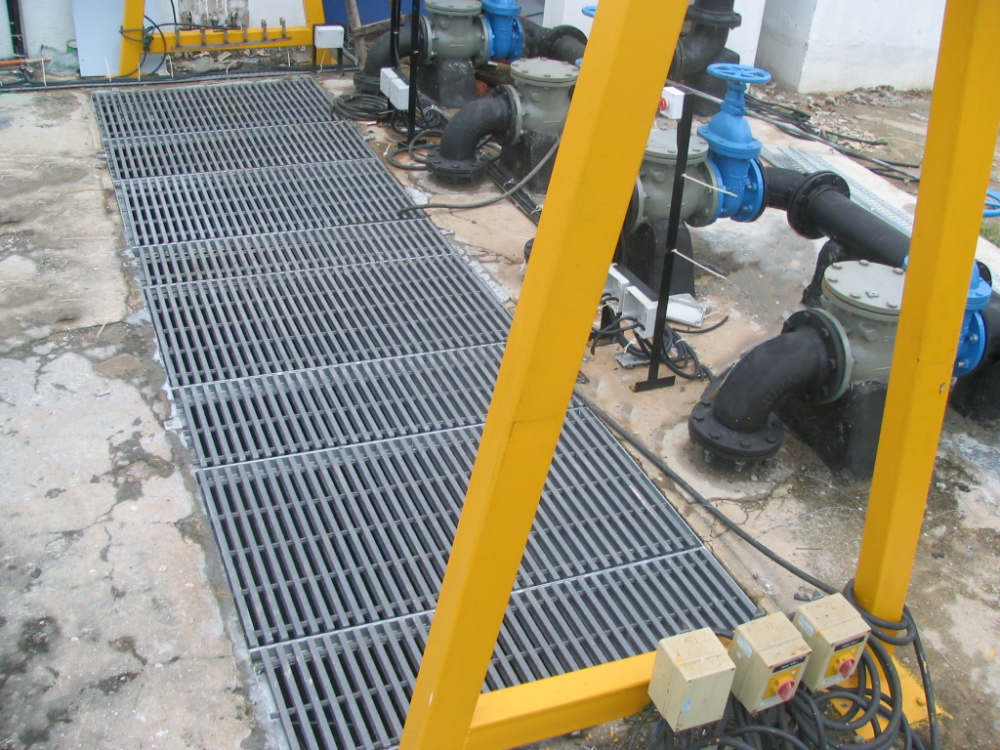
OCM's custom fiberglass products are designed to withstand harsh environments and conditions. They can be used for applications that require high strength-to-weight ratio, corrosion resistance, fire resistance, electrical insulation properties, and durability. Some examples of OCM's custom fiberglass products include tanks, pipes, ducts, housings, enclosures, grating systems, panels, covers, and many more.
Competitive Cost
One of the advantages of choosing OCM Enterprise as your fiberglass manufacturer is their competitive cost. They offer affordable prices without compromising on quality or performance. Their production line is optimized for efficiency to reduce manufacturing costs while maintaining high-quality standards.
OCM's pricing strategy is transparent and fair. They provide detailed quotes with no hidden fees or charges upfront. Customers can choose from different pricing models based on their requirements such as volume discounts or project-based pricing.
In-House Production Line
Another advantage of working with OCM Enterprise is their in-house production line. They have complete control over the manufacturing process from start to finish. This allows them to ensure consistent quality standards throughout the production cycle.
OCM's state-of-the-art facilities enable them to produce large quantities of custom fiberglass products efficiently without compromising on quality or lead times. Their production line includes advanced equipment such as CNC machines for precision cutting and shaping of composite materials.
Serving Various Industries
OCM Enterprise serves various industries that require high-performance composite materials such as oil and gas exploration companies that need durable pipe systems for offshore drilling operations; automotive manufacturers that require lightweight and strong components for their vehicles; and construction companies that need corrosion-resistant products for infrastructure projects.
Their experience in serving different industries has allowed them to develop expertise in designing custom fiberglass products that meet specific industry requirements. They work closely with customers to understand their needs and provide solutions that are tailored to their unique applications.
Company Summaries: Top Featured Fiberglass Manufacturers and Suppliers on Thomas
Thomas Features Top Fiberglass Manufacturers and Suppliers
It can be difficult to know where to start. Fortunately, Thomas offers a comprehensive list of top fiberglass companies that make it easy for customers to find what they need. With over 120 years of experience connecting buyers and suppliers, Thomas is a trusted resource in the manufacturing industry.
Thomas' Table Provides a Comprehensive List of Fiberglass Companies
One of the standout features of Thomas' fiberglass manufacturers list is its table format. The table provides an at-a-glance view of each company's location, website, and product offerings. Customers can easily sort the table by any column to compare companies based on their specific needs. Whether you're looking for a supplier close to home or a company that specializes in a particular type of fiberglass product, Thomas' table has you covered.
These Featured Companies Offer a Range of Fiberglass Products
From insulation to composites, fiberglass is used in a wide variety of applications across many industries. That's why it's important to choose a manufacturer or supplier that offers the products you need. The companies featured on Thomas' list offer everything from raw materials like fiberglass cloth and roving to finished products like pipes, tanks, and panels.
In addition to traditional uses like insulation and construction materials, some manufacturers on the list specialize in niche areas like marine-grade fiberglass for boats or high-temperature-resistant materials for industrial applications.
Thomas' List Includes Both Large and Small Fiberglass Manufacturers
No matter what size your business is or how much fiberglass you need, there are options on Thomas' list that can meet your requirements. Some companies are large-scale manufacturers with multiple locations across the country or even around the world. Others are smaller operations that specialize in custom orders or unique products.
One advantage of working with smaller manufacturers is the ability to get personalized attention and tailored solutions. On the other hand, larger companies may offer more resources and faster turnaround times. With Thomas' list, customers can compare and contrast different manufacturers to find the right fit for their needs.
Customers Can Easily Compare and Choose from the Top Fiberglass Suppliers on Thomas
In addition to its user-friendly table format, Thomas offers a wealth of information about each featured fiberglass manufacturer. Customers can click through to each company's profile page to learn more about their history, capabilities, certifications, and more. Some profiles even include customer reviews or case studies that provide additional insight into a company's strengths and weaknesses.
By using Thomas' list of top fiberglass manufacturers and suppliers, customers can save time and hassle in their search for high-quality products. With so many options available in one place, it's easy to compare prices, features, and services to make an informed decision. Whether you're a small business owner or a purchasing manager at a large corporation, Thomas has everything you need to find the right fiberglass supplier for your needs.
Capabilities of Fiberglass Fabrication Companies and Suppliers
What is fiberglass fabrication, and how is it performed?
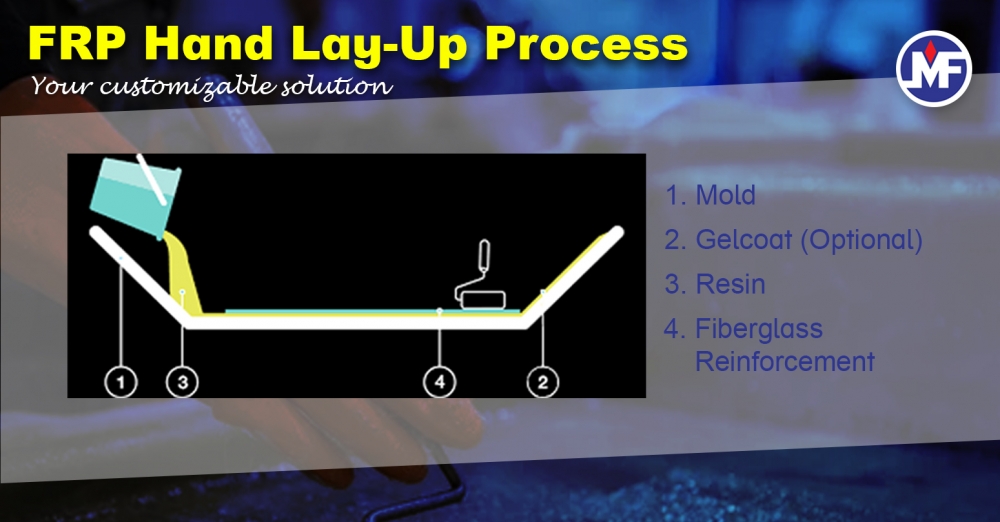
Fiberglass fabrication is a process that involves the creation of fiberglass products through the use of raw materials such as filaments and glass fibers. The process typically begins with the selection of appropriate raw materials based on the desired product specifications. The selected materials are then processed using various techniques such as weaving, knitting, or braiding to create a fabric-like material.
Once the fiberglass fabric has been created, it can be molded into different shapes using techniques such as compression molding or resin transfer molding. These molding techniques involve applying heat and pressure to the fiberglass fabric while it is in a mold to create a final product with the desired shape.
Services offered by fiberglass fabrication companies
Fiberglass fabrication companies offer a wide range of services for various industries, including aerospace, construction, and furniture. These companies specialize in creating custom-made products based on specific customer requirements. Some common services offered by these companies include:
-
Design and engineering: Fiberglass fabrication companies work closely with customers to understand their needs and develop customized solutions that meet their requirements.
-
Prototyping: Before creating a final product, fiberglass fabrication companies may create prototypes to test functionality and ensure that all specifications are met.
-
Manufacturing: Once the design has been finalized, fiberglass fabrication companies manufacture products using various techniques such as compression molding or resin transfer molding.
-
Finishing: After manufacturing, products may undergo finishing processes such as sanding or painting to improve their appearance.
Role of suppliers in the industry
Suppliers play an essential role in the fiberglass industry by providing raw materials such as filaments and glass fibers to manufacturers. These suppliers source high-quality raw materials from around the world and provide them to manufacturers at competitive prices.
In addition to providing raw materials, some suppliers also offer value-added services such as technical support or training for manufacturers. This helps ensure that manufacturers are using the raw materials correctly and can produce high-quality products.
Applications of fiberglass materials
Fiberglass materials have a wide range of applications across various industries. One popular application is in the furniture industry, where fiberglass is used to create chairs, tables, and other pieces of furniture. Fiberglass furniture is popular due to its strength and durability, making it an ideal material for outdoor use.
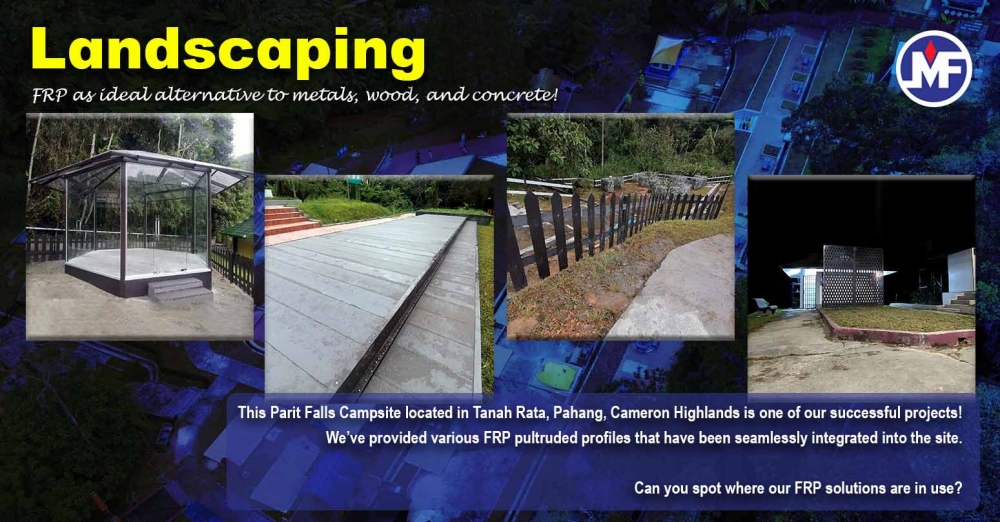
In addition to furniture, fiberglass materials are also commonly used in the aerospace industry. Fiberglass composites are lightweight yet strong, making them ideal for use in aircraft components such as wings or fuselages. The construction industry also uses fiberglass materials for applications such as insulation or roofing.
Importance of distribution firms
Distribution firms play a crucial role in the fiberglass industry by providing efficient transportation and logistics services for fiberglass products. These firms ensure that products are delivered on time and in good condition, which is essential given the fragile nature of many fiberglass products.
In addition to transportation services, distribution firms may also offer value-added services such as inventory management or order tracking. This helps ensure that customers receive their orders quickly and efficiently while minimizing any potential disruptions to their operations.
Top Fiberglass Suppliers in the USA that Qualify for Diversity Status
Fiberglass is a popular material used in various industries, including construction, automotive, and aerospace. The United States is home to several fiberglass manufacturers that offer high-quality products and services. However, not all of these suppliers qualify for diversity status, which is essential for businesses that want to work with government agencies.
What is Diversity Status?
Diversity status refers to the certification program offered by the Small Business Administration (SBA) for businesses owned by minorities, women, veterans, and other disadvantaged groups. This program aims to promote equal opportunities for small businesses in federal contracting. Companies with diversity status can access a wide range of benefits and opportunities such as mentorship programs, training workshops, and government contracts set aside specifically for diverse businesses.
Top Fiberglass Suppliers That Qualify for Diversity Status
-
Strongwell - Founded in 1956 and headquartered in Virginia, Strongwell is a leading manufacturer of pultruded fiberglass products such as structural shapes, grating systems, handrails, and decking materials. The company has over 650 employees across nine locations worldwide and holds certifications from various organizations such as ISO 9001:2015 and AS9100D.
-
Enduro Composites - Established in 1954 and based in Texas, Enduro Composites specializes in manufacturing corrosion-resistant fiberglass products such as cable trays, trench covers, enclosures, tanks & vessels. The company has over 350 employees across four locations globally and serves clients from different industries such as oil & gas refineries.
-
Fiberglass Coatings Inc - Based out of Florida since its inception in 1979,Fiberglass Coatings Inc specializes on composite materials ranging from reinforcements like fabrics,mats etc to resins,epoxies,gelcoats etc. The company has over 50 employees and serves clients from different industries such as marine, aviation, and automotive.
Top Fiberglass Suppliers in the USA: Minority-Owned Businesses
Fiberglass suppliers in the USA are not limited to large corporations.
When people think of fiberglass manufacturers, they often think of large corporations with massive production facilities. However, that is not always the case. There are many smaller businesses owned by minorities that also play a significant role in the fiberglass industry. These businesses offer high-quality products and services, including distribution of fiberglass materials.
One such business is Fiberlay Inc, a minority-owned company based in Seattle, Washington. They have been providing composite materials since 1953 and have become one of the leading distributors of fiberglass materials in the Pacific Northwest region. Fiberlay offers a wide range of products for marine, automotive, aerospace, and industrial applications.
Another example is Composite Envisions, a minority-owned business based in Wisconsin that specializes in carbon fiber fabrics, Kevlar fabrics, and other composite materials. They offer a variety of products for hobbyists and professionals alike and pride themselves on their exceptional customer service.
Minority-owned businesses also play a significant role in the fiberglass industry.
Minority-owned businesses have made significant contributions to the American economy over the years. In fact, according to data from the US Department of Commerce's Minority Business Development Agency (MBDA), minority-owned firms contributed over $1 trillion to the US economy in 2015 alone.
One such business is The Composites Group, which is headquartered in Ohio and has been providing custom composites solutions since 1988. The company specializes in manufacturing high-performance thermoset composites for various industries like automotive, construction equipment, electrical insulation systems & more.
Another example is Gibco Flex-Mold, which is located in Florida and provides custom-made flexible molds for composite parts manufacturing. Gibco Flex-Mold has been serving customers worldwide for over 30 years with their innovative technology and expertise.
These businesses offer high-quality products and services, including distribution of fiberglass materials.
Minority-owned businesses in the fiberglass industry are known for their high-quality products and services. These businesses often have a more personal touch than larger corporations, which allows them to provide better customer service and support.
One such business is Fiberglass Coatings, a minority-owned company based in Florida that specializes in providing composite materials for marine applications. They offer a wide range of products like resins, gelcoats, paints, and other supplies needed for boat repair & maintenance. Fiberglass Coatings has been serving the marine industry since 1979 with exceptional customer service.
Another example is Express Composites, which is located in California and provides custom composite solutions for various industries like aerospace, automotive, medical devices & more. They have been providing innovative solutions to their customers since 1997 with their highly skilled team of experts.
Partnering with minority-owned fiberglass suppliers can help promote diversity and support small businesses.
Partnering with minority-owned fiberglass suppliers not only helps promote diversity but also supports small businesses. By supporting these businesses, you are helping to create jobs and stimulate economic growth within your community.
One such business is Advanced Composite Products & Technology (ACPT) based in California that specializes in manufacturing advanced composites structures for military aircrafts & commercial airlines. ACPT has received several awards from the US Department of Defense for its contribution to the aerospace industry as well as being recognized by Boeing as a supplier of excellence.
Another example is Carbon-Core Corp, which is headquartered in Maryland and provides lightweight core materials for various industries like marine, transportation & construction equipment. Carbon-Core has been providing eco-friendly solutions to its customers since 2000 while promoting sustainability through its innovative technology.
Top Fiberglass Suppliers in the USA: Women-Owned Businesses
Women-Owned Businesses as Top Fiberglass Suppliers in the USA
Women-owned businesses are making a name for themselves. These companies have been providing high-quality fiberglass products for various industries and applications. They are known for their expertise and innovative solutions that cater to the specific needs of their clients.
One of the leading women-owned businesses in this industry is AOC Resins. Founded by Dr. Elaine Armfield, AOC Resins is headquartered in Collierville, Tennessee, with manufacturing facilities located across North America, Europe, and Asia. The company offers a wide range of fiberglass products such as unsaturated polyester resins, vinyl ester resins, gelcoats, and bonding pastes.
Another notable women-owned business is Strongwell Corporation. Based in Bristol, Virginia, Strongwell has been supplying fiberglass products since 1956. Their offerings include pultruded fiberglass structural shapes and plates that are used for various applications such as bridges, pedestrian walkways, cooling towers, and marine structures.
Business Headquarters Located in Pennsylvania
Pennsylvania is home to several top fiberglass suppliers that are also women-owned businesses. One of them is Bedford Reinforced Plastics (BRP), which was founded by Joyce Paisley-Smith in 1974. BRP's headquarters is located in Bedford, Pennsylvania and they specialize in custom-engineered fiberglass-reinforced polymer (FRP) solutions for industrial applications such as chemical processing equipment and water treatment systems.
Another Pennsylvania-based company is Fiber-Tech Industries Inc., which was established by Patricia Beckman-Cramer in 1983. Fiber-Tech's headquarters is situated in Washington Court House and they offer a variety of FRP panels that are used for truck bodies/trailers, recreational vehicles (RVs), cold storage facilities, and more.
Vetrotex Products Among Offerings of Top Fiberglass Suppliers
Vetrotex is a well-known brand in the fiberglass industry and some of the top women-owned businesses in this sector offer Vetrotex products among their offerings. One of them is Glasforms Inc., which was founded by Karen Armstead in 1972. Glasforms' headquarters is located in Birmingham, Alabama and they specialize in pultruded fiberglass products such as rods, tubes, and custom profiles.
Another company that offers Vetrotex products is Composite Advantage LLC. Founded by Scott Reeve and Anita Gwaltney-Reeve in 2005, Composite Advantage's headquarters is situated in Dayton, Ohio. They provide innovative composite solutions for infrastructure applications such as bridge decks, rail platforms, and waterfront structures.
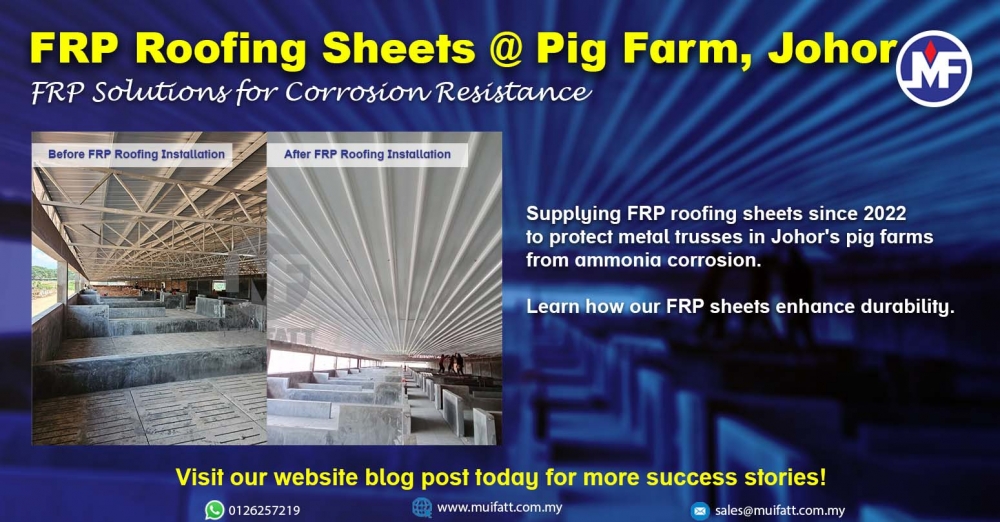
Fiberglass Manufacturers and Suppliers in Johor Bahru, Malaysia
Wide Range of Quality Fiberglass Products
Johor Bahru is home to several reputable fiberglass manufacturers and suppliers that offer a wide range of quality products. From fiberglass sheets, panels, pipes to tanks and other custom-made products, customers can choose from a variety of options based on their specific needs. These manufacturers use advanced technology and high-quality materials to produce durable and long-lasting fiberglass products.
One of the most significant advantages of buying fiberglass products in Johor Bahru is their exceptional quality. The manufacturers here use top-quality raw materials that ensure the final product's durability, strength, and resistance to harsh environmental conditions. They follow strict quality control measures throughout the manufacturing process to ensure that each product meets industry standards.
Growing Industry
The fiberglass industry in Johor Bahru has been growing steadily over the years due to its high demand across various industries such as construction, automotive, marine, aerospace, electricals & electronics, etc. The city's strategic location near Singapore also makes it an ideal place for businesses looking for cost-effective manufacturing solutions.
The growth of this industry has resulted in increased competition among manufacturers and suppliers in Johor Bahru. As a result, companies are continuously innovating new technologies and techniques to stay ahead of the competition while still maintaining high-quality standards.
Customization Options Available
Another advantage of working with fiberglass manufacturers in Johor Bahru is their ability to provide customized solutions based on customer requirements. Whether it's designing unique shapes or sizes or incorporating specific features into the final product - these manufacturers can provide tailored solutions that meet individual needs.
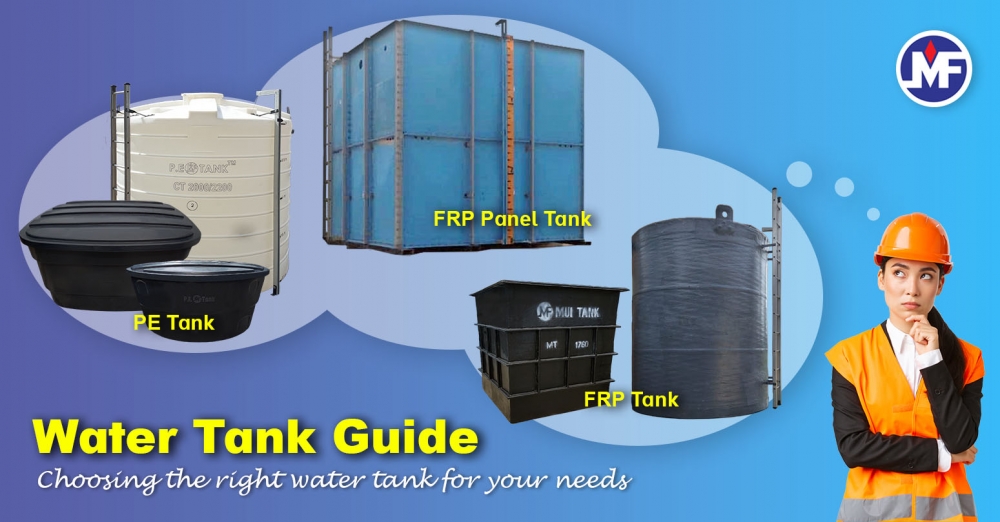
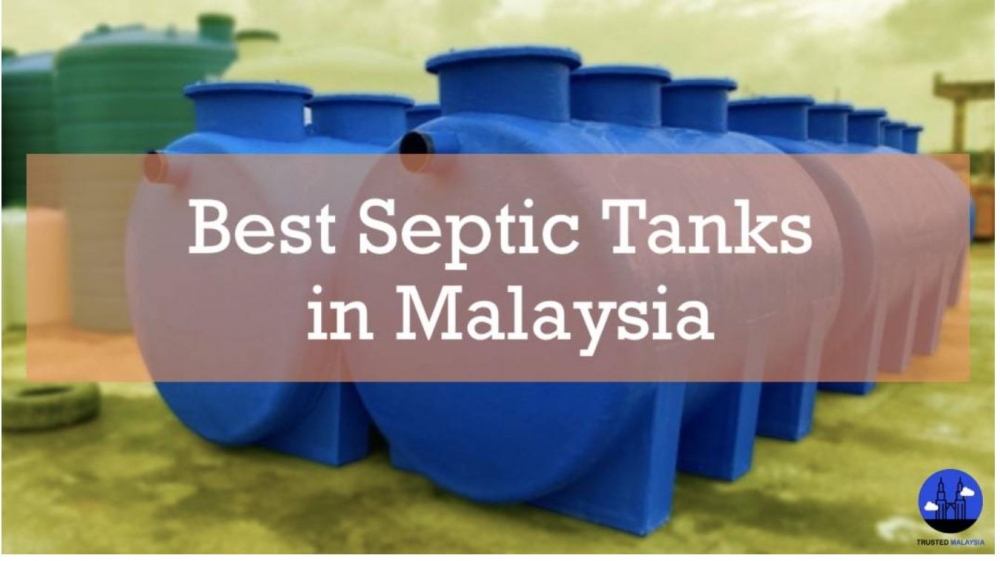
For instance, if you need a customized water tank for your business or home usage with specific dimensions or features like UV protection or insulation properties - you can get it done by working with one of these manufacturers. They have skilled professionals who can understand your requirements and design products that meet your needs.
Final Thoughts on Fiberglass Manufacturer
Reducing Plastic Waste with Fiberglass Manufacturers
Fiberglass manufacturers play a significant role in reducing plastic waste. As the world becomes more aware of the environmental impact of plastic, many industries are turning to fiberglass as a sustainable alternative. Unlike plastic, which can take hundreds or even thousands of years to decompose, fiberglass is recyclable and can be used for multiple purposes.
In addition to being environmentally friendly, fiberglass has several advantages over traditional materials like wood and metal. For example, fiberglass is lighter than steel and stronger than aluminum. It also has excellent thermal insulation properties, making it an ideal material for building insulation.
Choosing a Reliable Fiberglass Manufacturer
Choosing a reliable fiberglass manufacturer is crucial for ensuring quality and safety. When selecting a manufacturer, it's essential to consider their experience in the industry, reputation among customers, and certifications they hold.
A reputable fiberglass manufacturer should have a proven track record of producing high-quality products that meet industry standards. They should also use state-of-the-art equipment and adhere to strict safety protocols when manufacturing their products.
The Durability of Fiberglass
Fiberglass is known for its durability and resistance to wear and tear. It can withstand harsh weather conditions without cracking or warping, making it an ideal material for outdoor applications such as boat hulls or wind turbine blades.
Fiberglass is also resistant to corrosion from chemicals and saltwater exposure. This makes it an excellent choice for industrial applications where materials are exposed to harsh environments regularly.
Wide Range of Products Offered by Fiberglass Manufacturers
Fiberglass manufacturers offer a wide range of products designed for various industries such as construction, transportation, marine, aerospace, and renewable energy. These products include everything from insulation batts to custom-made parts such as pipes, tanks or ductwork.
Working with a fiberglass manufacturer allows businesses to access these specialized products at competitive prices while ensuring that they meet their specific requirements.
Cost Savings with Fiberglass Manufacturers
Working with a fiberglass manufacturer can lead to significant cost savings in the long run. Although fiberglass may be more expensive than some traditional materials upfront, its durability and low maintenance costs make it a cost-effective option over time.
For example, fiberglass insulation can save homeowners up to 40% on their energy bills compared to other types of insulation. Similarly, using fiberglass in wind turbine blades can increase their lifespan by up to 25 years, resulting in significant cost savings for renewable energy companies.
Fiberglass Manufacturers and Suppliers in Cheras, Malaysia
Choosing a reliable fiberglass manufacturer is crucial to ensure that the products you receive are of high quality and meet your specific needs. In Cheras, Malaysia, there are various manufacturers and suppliers of fiberglass products to choose from.
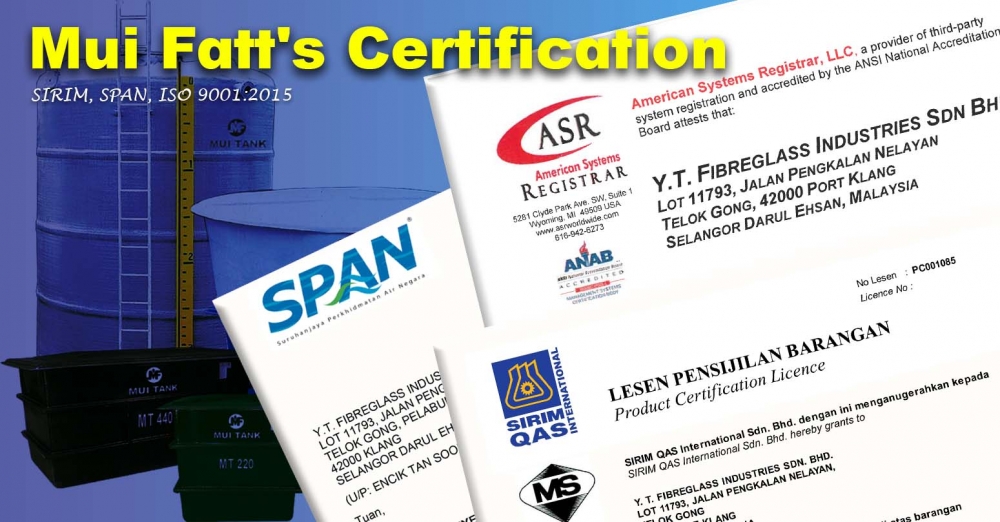
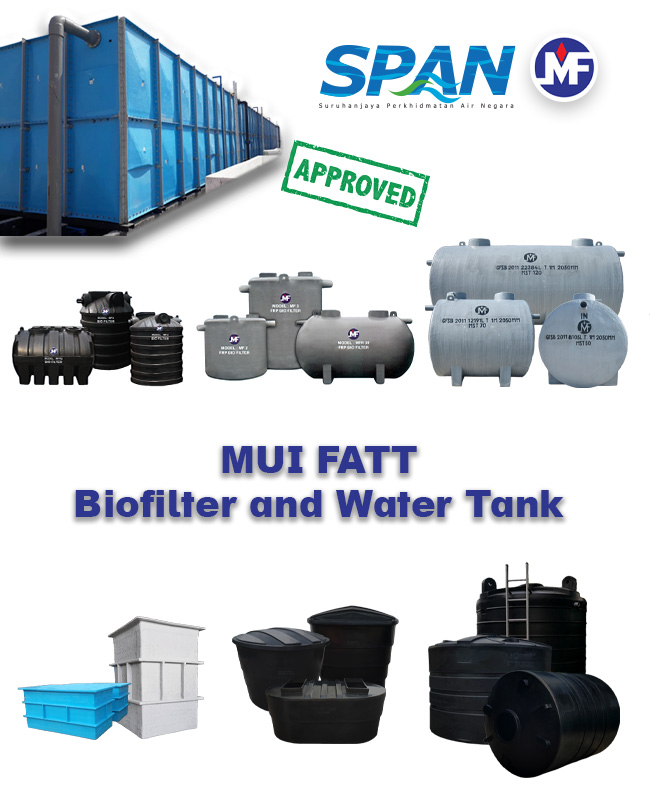
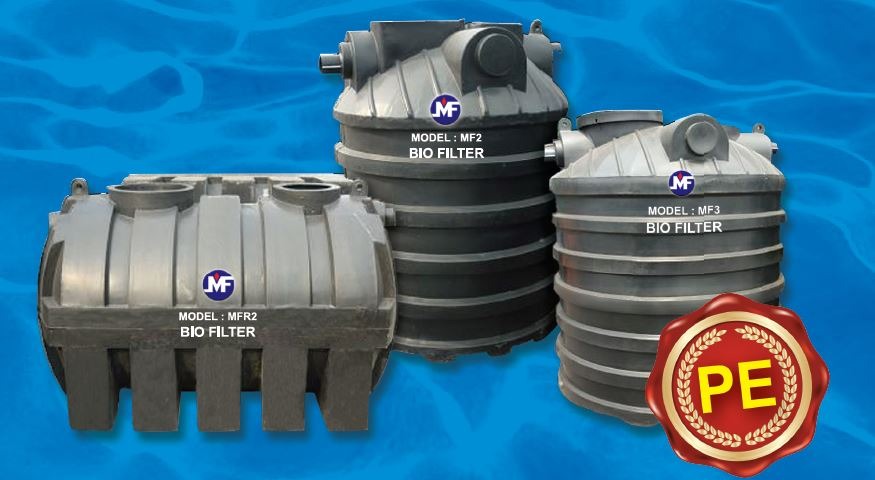
Among the top fiberglass manufacturers and suppliers in Selangor, Malaysia are OCM Enterprise. They offer a wide range of high-quality fiberglass products such as tanks, pipes, gratings, and more. With their years of experience in the industry, they have established themselves as a trusted provider of fiberglass solutions.
If you're looking for top-rated fiberglass manufacturers and suppliers in the USA, Thomas can provide you with comprehensive company summaries to help you make an informed decision. There are also several capable fiberglass fabrication companies and suppliers that can cater to your unique requirements.
For those who prioritize diversity status when choosing a supplier or manufacturer, there are several options available in the USA. Some of these include minority-owned businesses like Fiber-Tech Industries Inc., women-owned businesses like Strongwell Corporation, and others.
In Johor Bahru, Malaysia there are also many reputable manufacturers and suppliers of fiberglass products available for your consideration.
It's important to do your research beforehand. Look for companies with good reviews and ratings from previous customers. Consider their experience in the industry as well as their capabilities.
In conclusion, finding a reliable fiberglass manufacturer or supplier is essential if you want to get high-quality products that meet your specific requirements. Take time to research and compare different options before making a final decision.
FAQs
What types of fiberglass products can I find at OCM Enterprise?
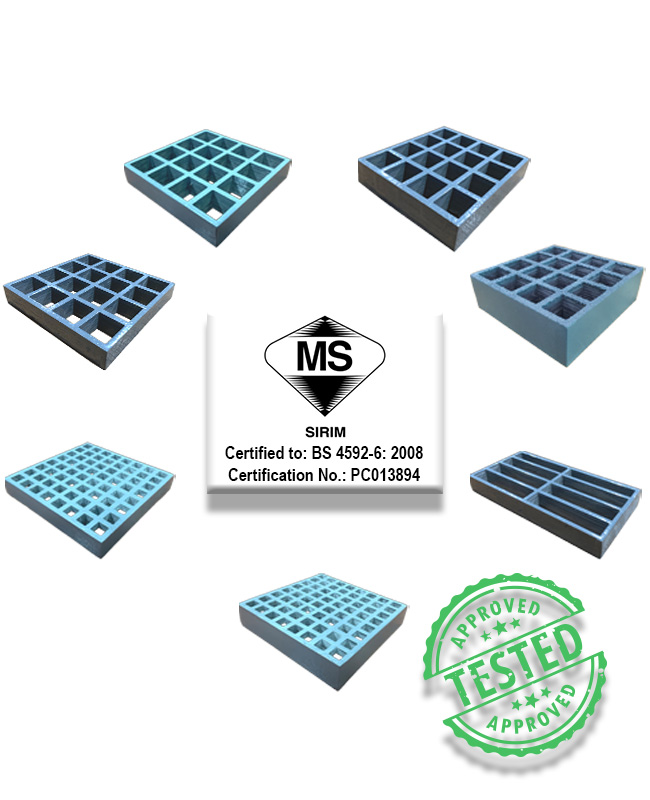
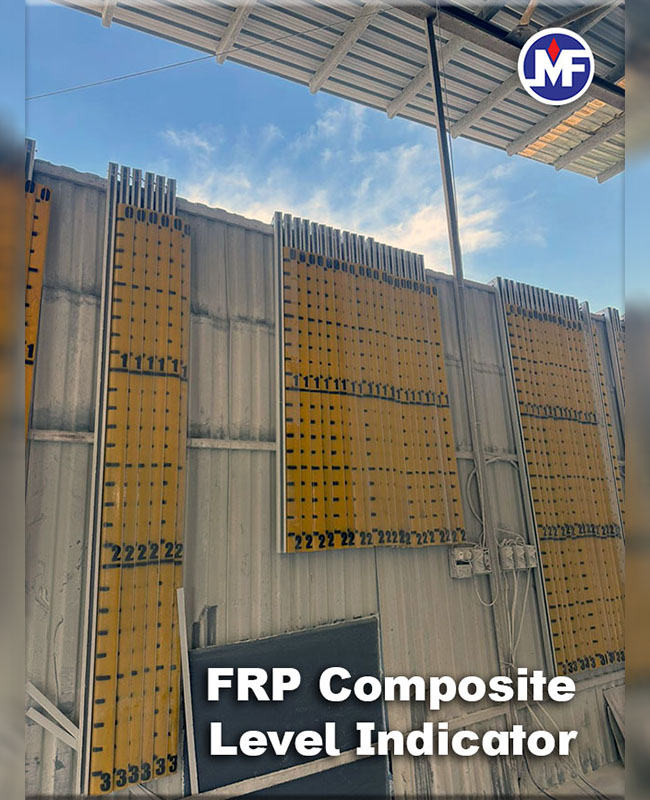
OCM Enterprise offers a wide range of high-quality fiberglass products including tanks, pipes, gratings, panels, ladders & platforms.
How can I determine if a particular supplier is reliable?
You can determine if a supplier is reliable by checking their reviews and ratings from previous customers. You can also consider their experience in the industry as well as their capabilities.
What are some factors to consider when choosing a fiberglass manufacturer or supplier?
Some factors to consider include the company's experience, capabilities, reviews & ratings from previous customers, and whether they offer products that meet your specific requirements.
Can I find minority-owned or women-owned fiberglass suppliers in the USA?
Yes, there are several minority-owned and women-owned businesses that specialize in fiberglass manufacturing and supply in the USA.
How important is it to choose a reliable fiberglass manufacturer?
Choosing a reliable fiberglass manufacturer is crucial if you want to get high-quality products that meet your specific needs. A reliable manufacturer will also ensure timely delivery of your order.